Bartending Basics Video Tutorial
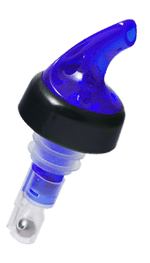
More and more establishments nowadays are using measured pour spouts behind the bar. These are spouts that automatically measure the amount of alcohol poured into each drink using a ball-bearing system which stops the flow of liquid at a calibrated amount (usually 1oz – 2oz in increments of .25 or .5oz).
Using a measured pourer is the cheap alternative to a full-blown $3000-$10,000 USD system of liquor control. These pourers are ideal for smaller bars who don’t have the cash-flow to invest in one of the more expensive liquor inventory control systems.Another method of inventory control that many smaller bars employ is the eyeballing method. This consists of each bartender eyeing how much liquid is left in each of the bottles at the end of the night and recording on a sheet a number ranging from 0.5 – 0.95 (point 5 to point 9 5) or sometimes just 0.1-0.9.
Although this method is certainly better than not doing any inventory at all, it definitely has its drawbacks. Most notably is that every bartender has a different idea of what 0.3 or 0.7 looks like – especially since many of the liquor bottles behind a bar have different shapes. The cheap solution to this costly problem is the Shot Glance Inventory Control System which you can pick up in our bar store for $129.95.
In this bartending basics video tutorial, you’ll learn how to pour drinks using these measured pourers.
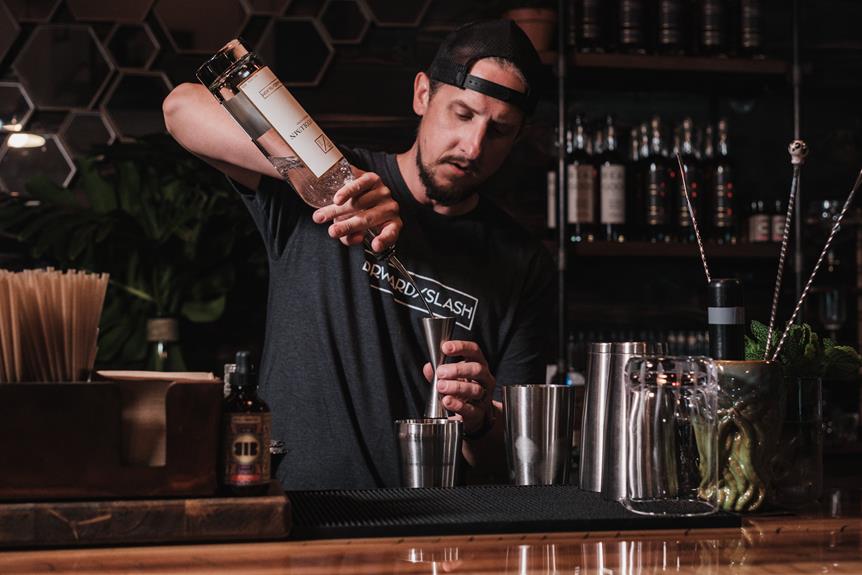
How to Pour Using a Measured Pour Spout Bartending Basics
When held at a 45-degree angle, the ball bearing in the spout only allows a pre-calibrated amount to pass through the nozzle before it drops and cuts of the flow of alcohol.
To reset the nozzle for the next drink, you simply bring the bottle back to a standing position. This drops the bearing back in place and sets it up for the next pour.
In addition to saving the bar literally thousands of dollars a month in liquor spillage and waste; this system allows the bartender to tell customers who ask for “a stiff drink” that every ounce is counted. It makes it easier for some of the greener bartenders who have trouble saying no to customers or who instead give customers a bit extra in hopes of a higher tip.
Now some lifelong bartenders don’t like any type of measured pourer. They prefer to free pour and, to their credit, they can probably free pour almost as accurately as a measured pour spout can. The problem is that the other less-experienced bartenders can’t do it accurately and that sets the stage for huge losses in liquor spillage, waste and ‘handouts’.
…even if they don’t know it yet.
[Video Transcript] Bartending Basics Video Tutorial: How to Pour Using a Measured Pour Spout

For our tutorial now, we’re going to use a speed pourer. Ok, this is a one ounce pour spout. It will automatically measure one ounce. Ok so, this..some people love these thing, some people hate them. Ok, you might not even have a choice. You can keep what your bar is using. Ok, this one here has a little ball bearing inside and then you put it at a 45 degree angle just as the same as a regular bottle and it will stop. The ball bearing will stop ones one ounce pour down. So, the benefit is that measurement wise you’re always accurate to an ounce. And, it also allows you to use both hands, right – so you’re pouring and you’re filling up with your mix at the same time. Sometimes they don’t work and continues to pour, that could be a problem. It also prevents ah.. you get customers..hmm maybe in the states there’s a lot of free pouring. In Canada, we’re pretty regulated so we don’t tend to free pour too often and it’s usually either a shot glass or some sort of mixing.. some sort of pour spot, measure pour spout like this one here. So, this prevents people from saying, “Oh, can i have a little extra in my drink?”, or “Can i have a little bit more? Tip the elbow right there buddy.” Ok you know what, i can’t. i’m sorry it’s one ounce. You know i can give you 2 ounces but i have to charge it for you. So, it kind of xxx bar tenders sometimes get little push to, to give a little extra but even though it’s gonna be well xxx in the bar xxx. So, this one prevents that as well. So here we go. We’ll start down here with our two glasses, both hands. Fill it up with ice. Now instead of the shot glass, you’re going to pick up the gun. Ok, and here we are, rum & coke and then down. To reset it back up, rum & 7-up. Ok, back down and then again, it’s the same we use the straws and then your both hands, always use your both hands. Ok, put the two garnishes xxx and lemon. Here we go, rum & coke and a vodka 7-up. So it’s no different ah…we do have to reset. Ok, when you use the pour spouts, you have to come up and then back down to reset the ball bearing to go back up. Ok, some people love these things. Some people hate them. I’m in the middle of somewhere. I haven’t used them regularly. I always use the shot glasses so… i like both of them, i mean you can do.. just gotta practice. Whatever method you use, just keep on practicing and practicing. Learn your drinks and learn how to pour and get fluid with the motion so it’s just xxx glass, quick motion. Glasses. Ice. Gun. Up. Pour. Down. Up. Pour. Ok, always use two hands. Ok, here you go. Ok, that’s it for this tutorial on “How to Pour”. I will see you next time at probably next tutorial. I’m Reese Richards form BarsandBartending.com, you’re online resource for all things bars and bartending. I’ll see you next time. Thanks.