So Ya Wanna Know How to HomeBrew?
Brewing Your Own Beer is
Simpler Than You Think

- Expensive
- Taste Disgusting or
- Be Really Difficult to Do
And to be honest, that’s what we thought many moons ago before we started to homebrew our own beer.
The reality today is that breweries have taken care of the hard part for you. In many home brew kits, the malt, barley and hops has been combined into a beer concentrate – so that takes care of that aspect. And all the tools and equipment is supplied so you don’t have to worry about exactly what you need and at which stores to get it. And the home brew kits even include an instructional video and booklet to walk you through the whole process. The only thing left for you to do is to try different flavours until you find your perfect pint. If you encounter any difficulties along the way, Home Brew Problems should be able to solve it.
When you get to be a superstar brewer, you can start to tinker with the recipes and create your own signature homebrew beer – a one-of-a-kind beer that only you have access to.
In its simplest form, here are the steps to home brew your own beer:Note: since each home brew kit is going to have slightly different instructions and equipment, we are using Coopers to illustrate the steps – since its the best-selling home brew kit in the world, we thought there must be a reason.
- MIX
Mix up the beer concentrate and brewing sugar into the water - BREW
Add the yeast and let it ferment. - BOTTLE
Bottle your home brew, add some carbonation drops then store till ready. - ENJOY!
The satisfaction of brewing your own beer, free from additives and preservatives.
Now that you know how easy it is, lets break the steps down into a little more detail for you.
SANITIZING
Before you begin, all equipment MUST be cleaned and sanitized. This is a major cause of failure when brewing home brews. The beer will get infected if the equipment is not sanitized properly. Some homebrew kits will include a sanitizing agent but its really not necessary. Just use a capful of some unscented bleach and mix it with water – but be sure to rinse carefully afterwards to remove any residue. Do not use any forms of detergent or soap to sanitize – it doesn’t.
PREPARING THE MALT
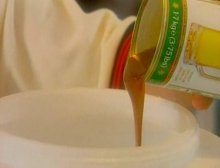
The beer concentrate that comes with your home brewing kit has to be heated up to allow it to pour out of the can. Simply submerge the can in a sink full of hot water for about 10 minutes or so.
MIXING
Pour the contents of the beer concentrate into the fermenter, then add the brewing sugar plus 2 litres of boiling water and mix. Then pour cold, purified water into the fermenter until it reaches the 23L mark. Store in an area between 21°C-27°C (70°F-80°F). This mixture is called wort (pronounced wert).
ADDING THE YEAST
Ensuring that your wort is between 21°C-27°C (70°F-80°F), now add the package of yeast and sprinkle it evenly over the surface area of the wort – and seal immediately.
SEALING
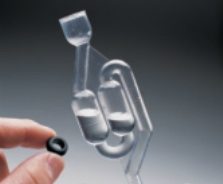
Carefully screw the lid on then insert the airlock through the grommet in the lid. Then pour purified cooled water into the airlock until the bulb portions are half full.
BREW
As confirmation that fermentation has begun, the airlock will begin to bubble within a couple of hours. As long as you keep the temperature between 21°C-27°C (70°F-80°F), fermentation should be complete within 4-7 days.
MEASURING THE SPECIFIC GRAVITY OF YOUR HOMEBREW
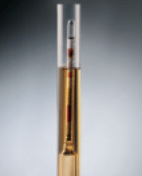
You’ll need to use the hydrometer to measure the gravity or density of your home brew. Draw some brew from the tap – enough to fill the tube so that the hydrometer floats. When ready, the final reading should be between 1008-1010.
PRIMING
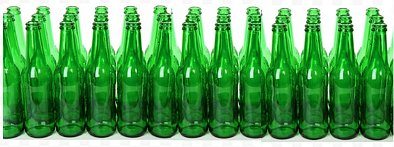
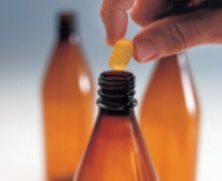
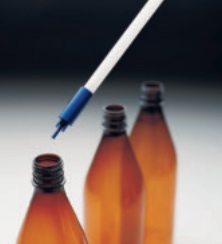
To prime the bottles for secondary fermentation, add the carbonation drops to the bottles – 1 drop for 345-375ml bottles and 2 drops for 740-750ml bottles.
FILLING
Connect the bottler to the tap and fill each of your bottles, leaving about 25mm (1 inch) of liquid in the bottom of the fermenter. This contains the yeast sediment and can be thrown out.
CAPPING
Screw on the caps and invert the beer 4 or 5 times gently to mix the carbonation drops and beer.
STORING
Store the bottles upright, again in an area with a temperature between 21°C-27°C (70°F-80°F) for 7 days. After that, the bottles can be stored at room temperature for another 7 days. Storing the beer longer than 14 days (but less than 3 months) will allow the flavour to improve.
ENJOY
Anytime after the 14 days, sample your beer. If you are happy with the taste, drink away. If not, leave it for a couple more days.
And that’s it! Now you can sit back and enjoy your own home brew made by your hands in your house. No more trips to the beer store for you.
Each can of beer concentrate makes about 66 – 341ml bottles of beer. Since the home brewing kit from Coopers costs about $100 USD, then each bottle from your first brew will cost you approximately $1.50 / bottle to make.
However, since you now own the equipment, you only need to buy the beer concentrate, brewing sugar and carbonation drops and they cost approximately $35 USD, bringing your per bottle cost for subsequent brews down to about $0.50 / bottle.
Imagine that – 50 cents per bottle for your very own home brew – that you made yourself, that tastes like no other, with no preservatives or additives. Mmmm, healthy, home brewed beer.
